What are Webhooks?
A Webhook is an event notification sent to a URL of your choice. Users can configure them to trigger events on one site to invoke behavior on another.
Webhooks are useful for integrating with third-party services and other external API that support them.
Webhooks in WooCommerce
Webhooks were introduced in WooCommerce 2.2 and can trigger events each time you add, edit or delete orders, products, coupons or customers.
It’s also possible to use webhooks with WooCommerce actions, e.g., Create a webhook to be used every time a product is added to the shopping cart, using the action woocommerce_add_to_cart.
Webhooks also make it easier for third-party apps to integrate with WooCommerce.
Creating webhooks
To create a new webhook:
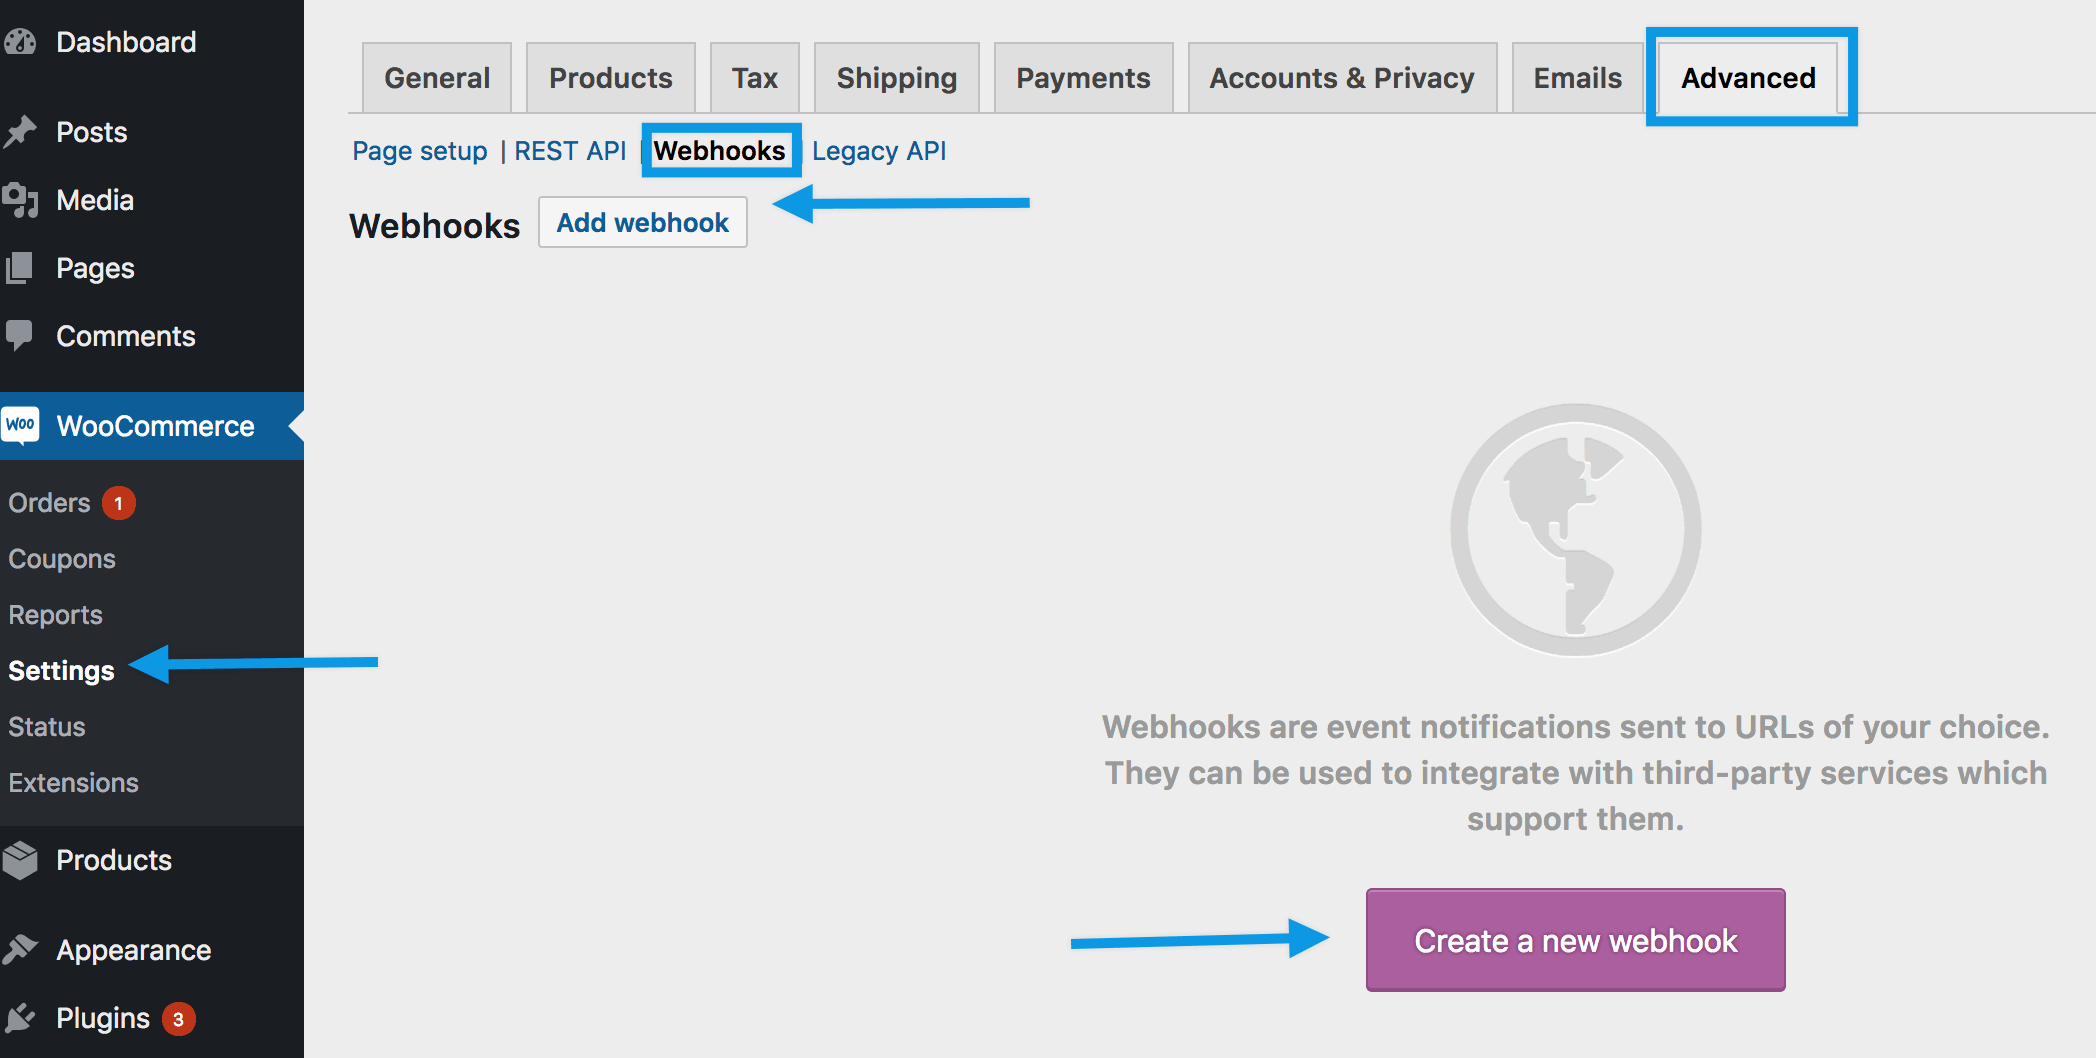
1/ Go to: WooCommerce > Settings > Advanced > Webhooks.
Note: Webhooks were formerly found under WooCommerce > Settings > API prior to WooCommerce 3.4.
2/ Select Create a new webhook (first incident) or Add webhook. The Webhook Data box appears.
3/ Enter.
- Name: The name is auto-generated as “Webhook created on [date and time of creation]” as a standard to facilitate creation. Change the name to something else.
- Status: Set to Active (delivers payload), Paused (does not deliver), or Disabled (does not deliver due delivery failures).
-
Topic: Indicate when the webhook should be triggered – Order Created, Product Deleted, or Customer Updated. There are also Action and Custom options.
-
Action Event: This option is available when the Topic is a WooCommerce Action, such as
woocommerce_add_to_cartfor when customers add products to the shopping cart. -
Custom Topic: This option is for advanced users only. It’s possible to introduce new, customized topics with the help of
woocommerce_webhook_topic_hooksfilter.
-
Action Event: This option is available when the Topic is a WooCommerce Action, such as
- Delivery URL: URL where the webhook payload is delivered.
- Secret: The Secret Key generates a hash of the delivered webhook and is provided in the request headers. This defaults to the current API user’s consumer secret, if nothing is entered.
4/ Save Webhook.
Note: The first time your webhook is saved with the Activated status, it sends a ping to the Delivery URL.
Webhooks are disabled after 5 retries by default if the delivery URL returns an unsuccessful status such as 404 or 5xx. Successful responses are 2xx, 301 or 302.
To increase the number of retries, you can use the woocommerce_max_webhook_delivery_failures filter function.
Editing and deleting webhooks
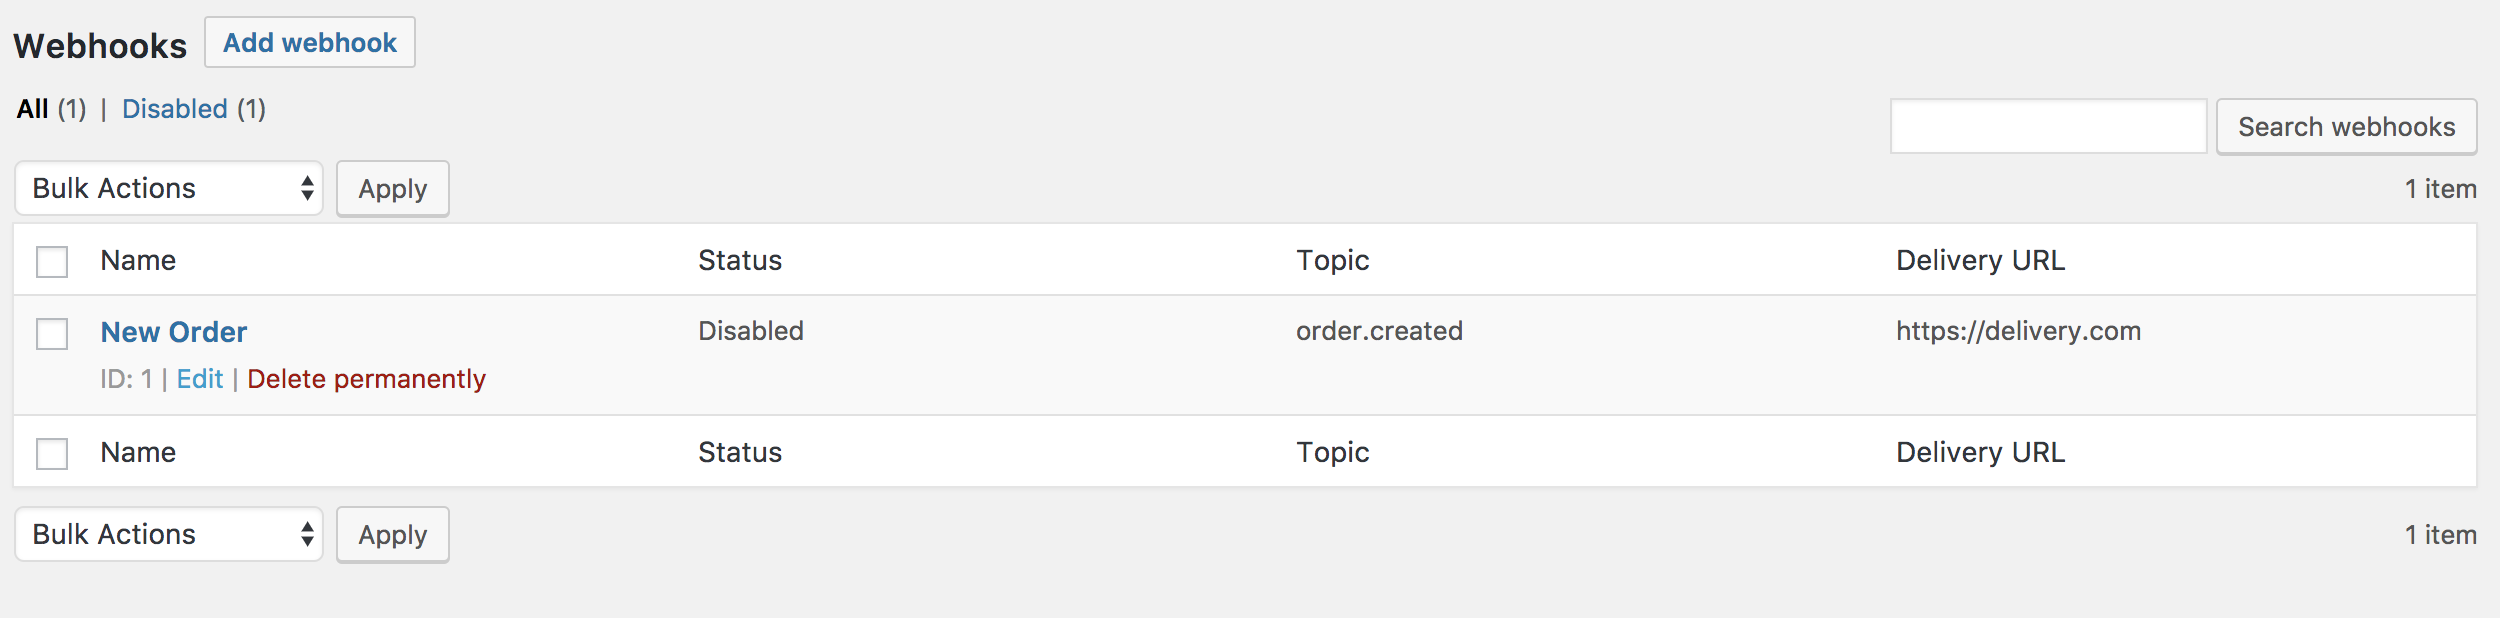
Webhooks are listed the same way as posts or products.
- Find the webhook you wish to alter.
- Hover over the name, and Edit and Delete permanently options appear.
- Delete, or make Edits and Save changes. Bulk deletion is also possible with the dropdown.
Webhook logs
WooCommerce saves logs of all events triggering a webhook. Webhook logs are found at: WooCommerce > Status > Logs.
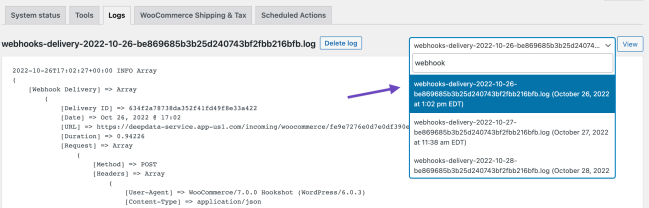
Logs may be reviewed to see delivery and response from the server, making it simpler to integrate and debug.


